So, you’ve heard the hype about fermented feed and you’re ready to give it a shot, huh? Great choice! This quick guide will get you fermenting like a pro (or at least make you feel like one).
Benefits (The Good Stuff)
- More eggs – Your chickens will be working overtime.
- Healthier hens – No more awkward chicken doctor visits.
- Lower feed costs – Who doesn’t love saving a buck?
Step-by-Step Guide
1. Dechlorinate the Water
Get yourself a bucket of water and let it chill with a loose-fitting cover so the chlorine can peace out. Give it at least 24 hours to evaporate. If you have well water, you can skip this step. (The well water’s probably already a better life choice anyway.)
2. Add the Feed
Grab a day’s worth of feed and toss it into a container with a lid that’s not entirely airtight. You’ll need room to add the water later, so leave some space. No need to squish everything in there like it’s a game of chicken Jenga.
3. Add Water
Now pour that dechlorinated water over the feed, covering it completely. It’s okay if some of the feed floats like a lazy raft in a kiddie pool. Save the leftover water; it’s going to be your fermentation sidekick for next time.
4. Wait Three Days
Set the bucket somewhere at room temperature (like the counter, not the sauna) and wait three days. Stir it at least once a day, and if the feed starts rising up like a floater at a pool party, use your saved water to keep it submerged.
5. Serve ‘Em Up
When the time is right, strain the liquid and serve it to your chickens. Voila! They’re now on the fermented feed train.
Things You Should Know
1. Smell Check
Open that lid and give it a whiff every time. You’ll get used to the sweet smell of success, but if it smells like a bad science experiment gone wrong (think rotten or boozy), toss it. Always double-check with a friend (or chicken) if you’re unsure.
2. Watch the Chickens
Be a poultry detective! Keep an eye on your chickens for a few days to make sure everyone’s happy. You might need to go cold turkey (no dry food) for a bit to get them to fully switch to the fermented stuff.
3. Track Your Progress
Before you go full fermentation fanatic, ask yourself: Are your chickens eating more and healthier? Are eggs up? Is your wallet a little heavier from saving on feed? Check your egg yield versus feed consumption, and see if the fermented feed is worth the extra effort. You’re a scientist now!
4. Liquid Gold
You can use the leftover liquid to start a fresh batch. It’ll shave a day off your fermentation time. But, beware: it’s a bit of a risk because the liquid can go bad faster, so make sure it smells just right.
5. Get Organized
Consider creating a rotation system. I use three water and three feed buckets to keep the fermentation train running smoothly. Think of it like a chicken feed assembly line. It’s efficient, and it looks impressive.
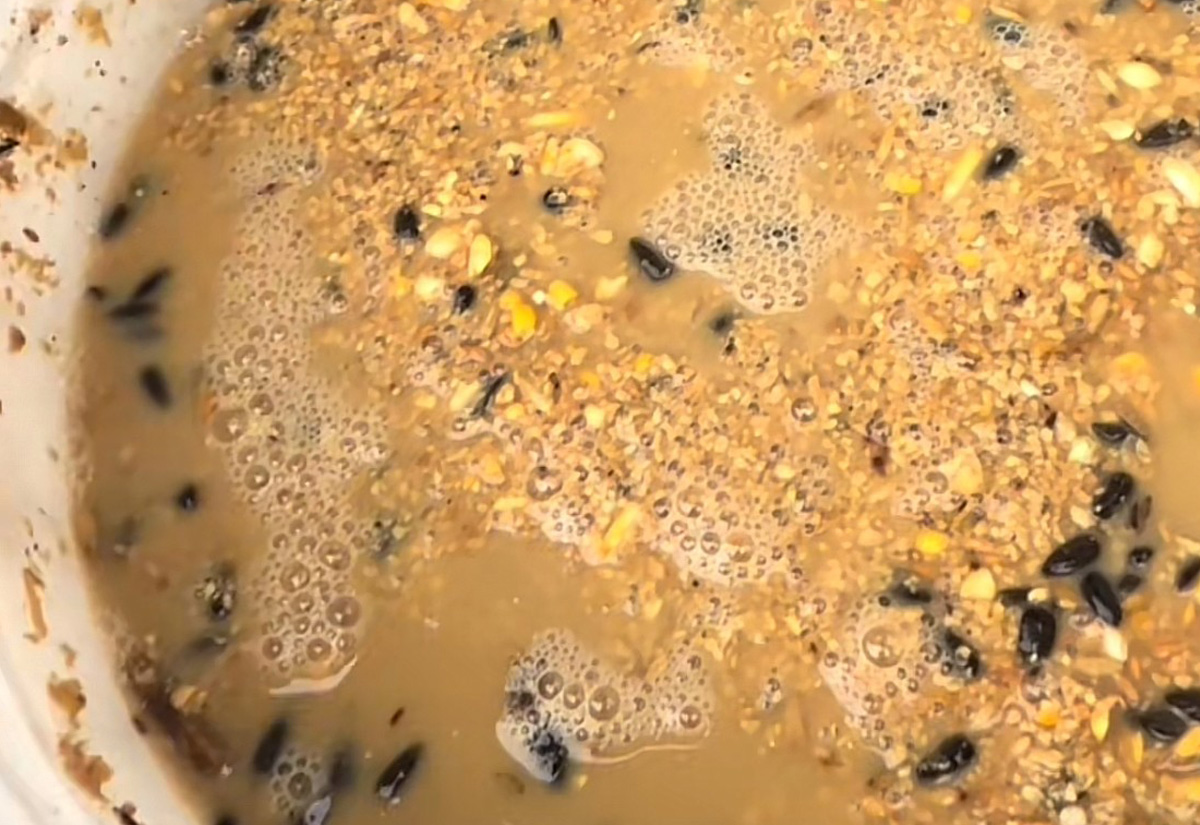
PHOTO: Fermented chicken feed (No Rulz Ranch Hatchery)