Building the chicken coop of my dreams

I jumped head first into the backyard chicken game in 2018, and bought eight chicks and a coop from a local farm store. Five of them turned out to be roosters, but that’s a whole different story. The bottom line is I’ve been chicken crazy ever since. When my husband, Landon, and I got married in 2021 my coop—which was starting to deteriorated due to poor quality wood—had to be moved along with my flock to his home more than 70 miles away. It made the trip, but it was clear the coop’s days were numbered. Furthermore, I had wanted to add to my flock for quite a while, but the size of my little coop wouldn’t allow for more chickens.

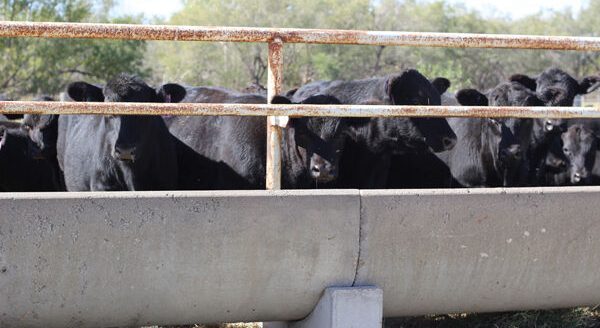
We had found ways to patch it up over the last couple years, but the need for a new chicken house became undeniable last fall when a raccoon was able to get through the gate and stole two of the hens I had raised as chicks. I was devastated and although I am extremely tender-hearted and it is not uncommon for me to tear-up at the sight of roadkill, I knew these raccoons would be the end of my chickens if something wasn’t done about them.
At that point we launched operation Raccoon Revenge and with the use of surveillance cameras, I monitored the chicken coop for any late-night visitors. When a raccoon showed up I send my husband/sniper out to take care of business. We disposed of six raccoons in about a month and although the news that the crazy blonde woman does not tolerate chicken thieves was probably making it’s way around our rural road, I knew the raccoons would be back one day and a secure coop was a necessity.
Making plans
Ever the planner, I conducted research for a few months on the options for a large walk-in coop that would last for decades and could be moved to a new location eventually in the event we build a new home. We looked at plans to construct a chicken house from the ground up, but then I heard groans from my husband about the time, materials and carpentry equipment involved. We decided a do-it-yourself, pre-cut shed kit was the best option.
I knew it would be a secure building with all of the necessary materials included and I could customize it to my desires and the needs of the chickens. We selected an 8′ x 10′ building with double doors in the front and picked it up from the hardware store in early March. Waiting on rain freed up some time for husband and he started on the chicken coop the first week in April. To protect the wood and give us light to work after dark, we chose to assemble the coop in an equipment shed at my in-laws house. They live a few miles down the road from us.
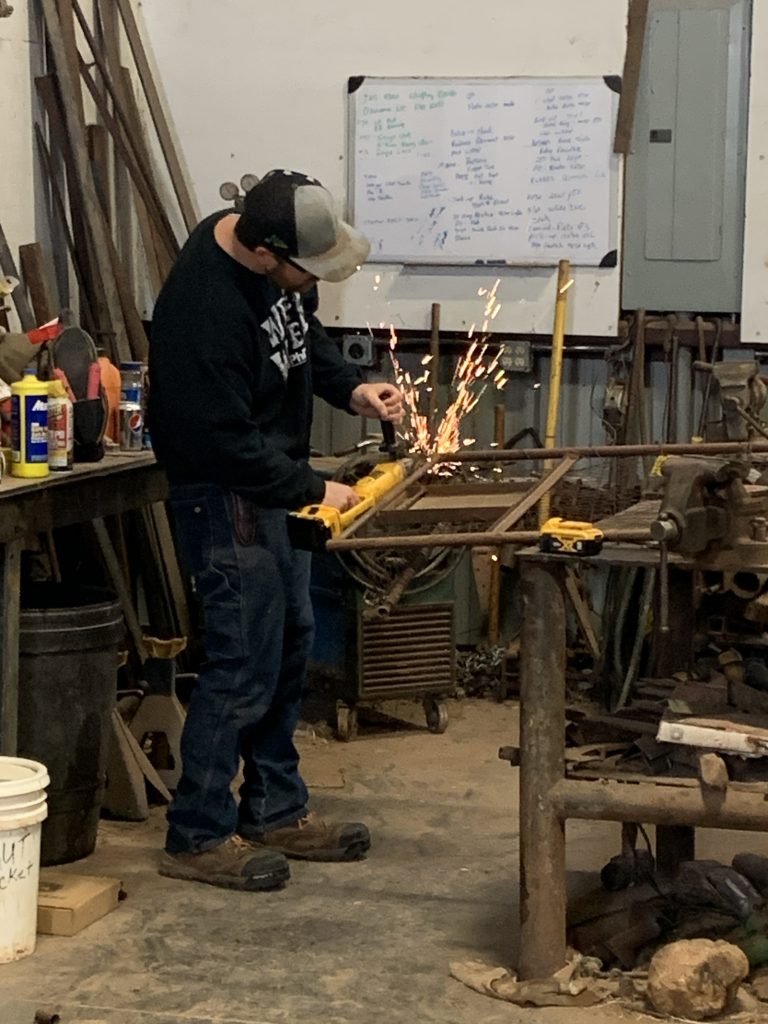
To keep the wood floor from rotting, give the building stability and make it easy to transport via trailer, my husband welded a 2 – 7/8 steel pipe frame. He even fabricated eyelets at each of the corners so it would be easy to use chains to move the building. He’s one smart cookie! I wasn’t much help during the welding, but when we started on the wood floor I became my husband’s carpentry assistant.
I must point out that he is a perfectionist even though he dreaded this project, that building was going to look professional by the time he was done with it—even if it killed him. The phrases I heard the most during this process were “oh no!”, “how did I get talked into this”, “my knees are killing me”, “I like how this came together”, “where’s the measuring tape” and my personal favorite: “I hate custom projects”.


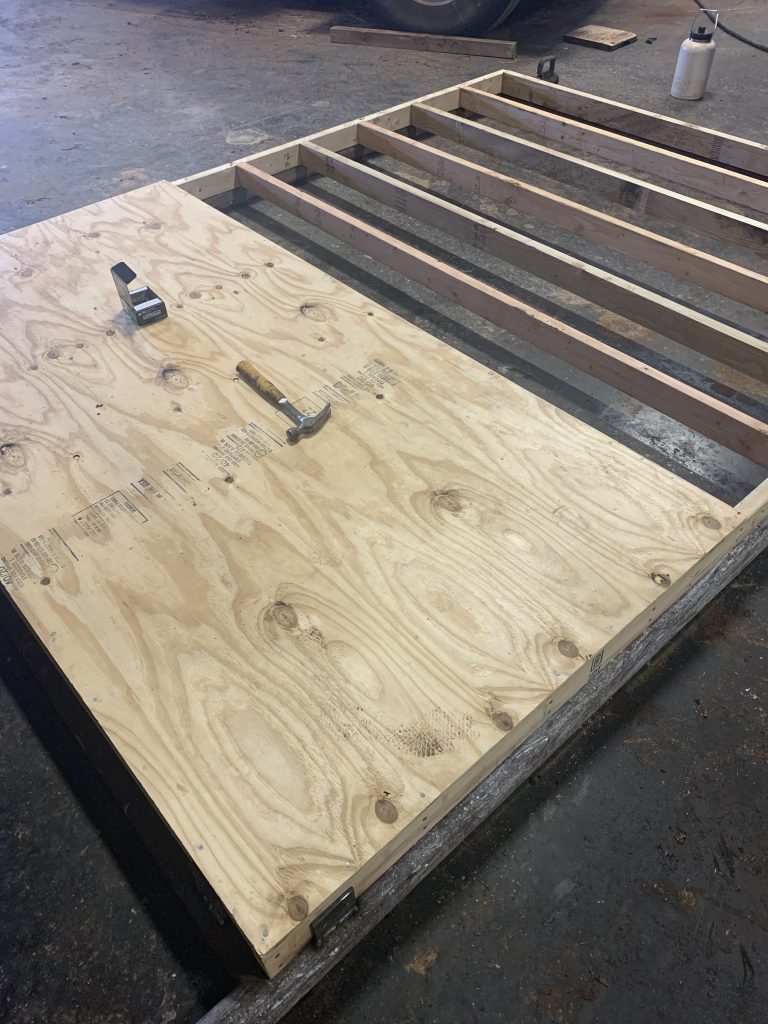

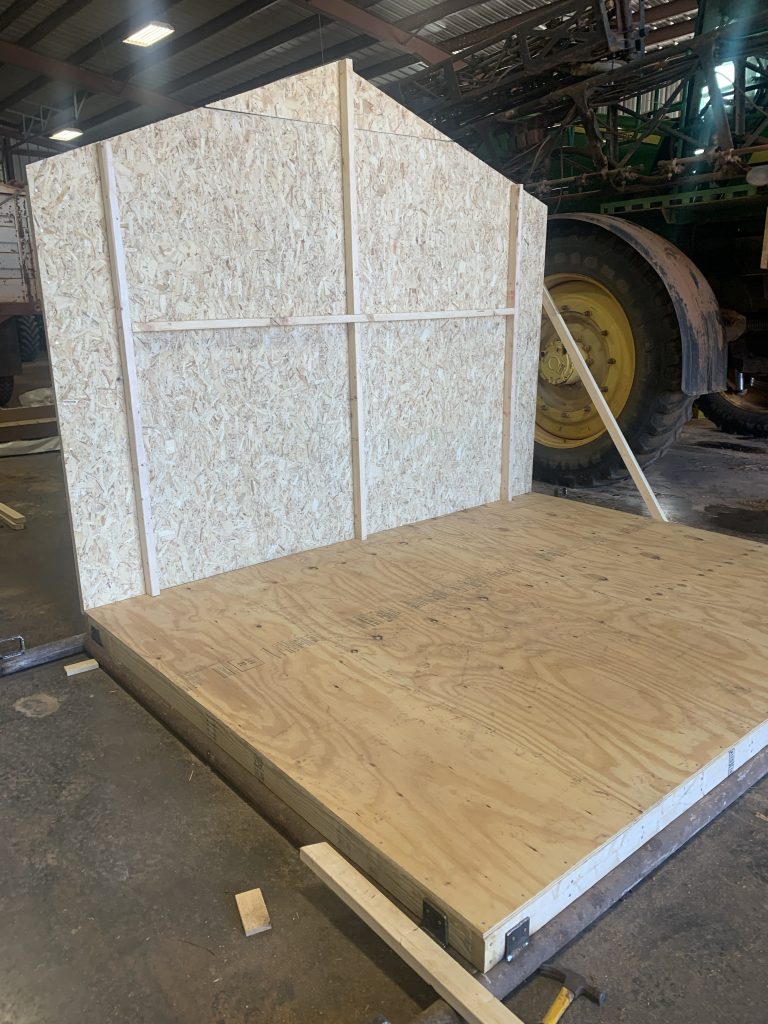
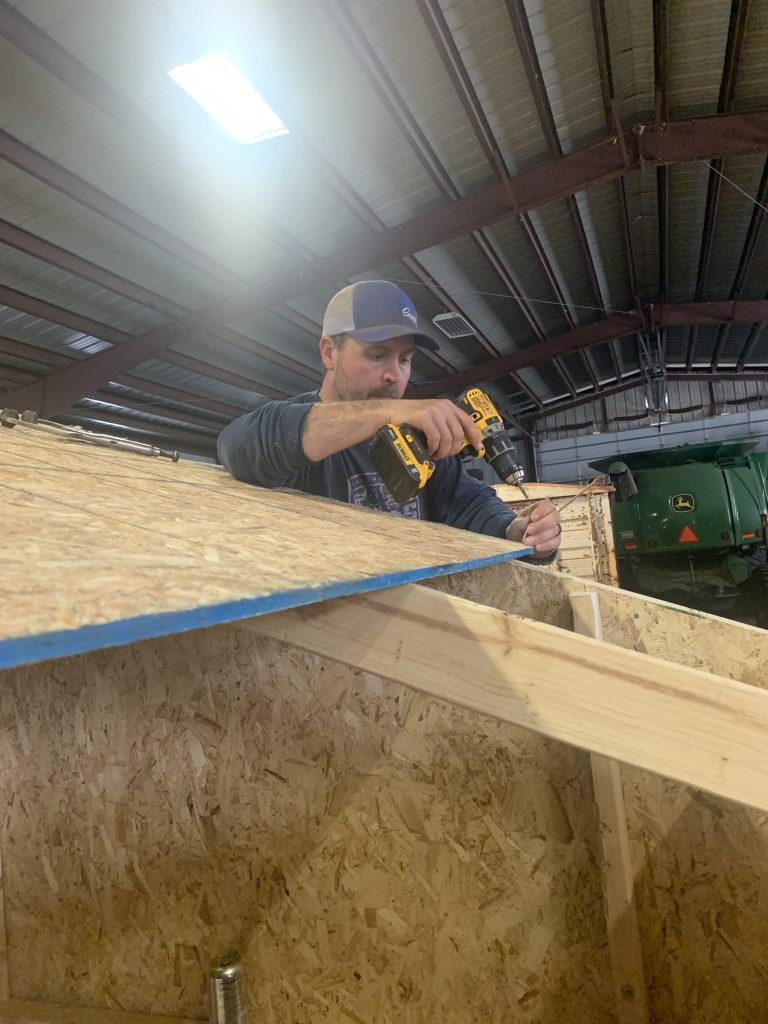
Next, we constructed the floor on top of the pipe base. The kit provided materials for an Oriented Strand Board (OSB) floor and five 2 x 4 studs to support it. To give our building more strength, we double the number of studs underneath the floor and purchased a sheet of plywood instead of the OSB. By mid-April the floor, walls, doors, rafters and the roof panels were constructed.


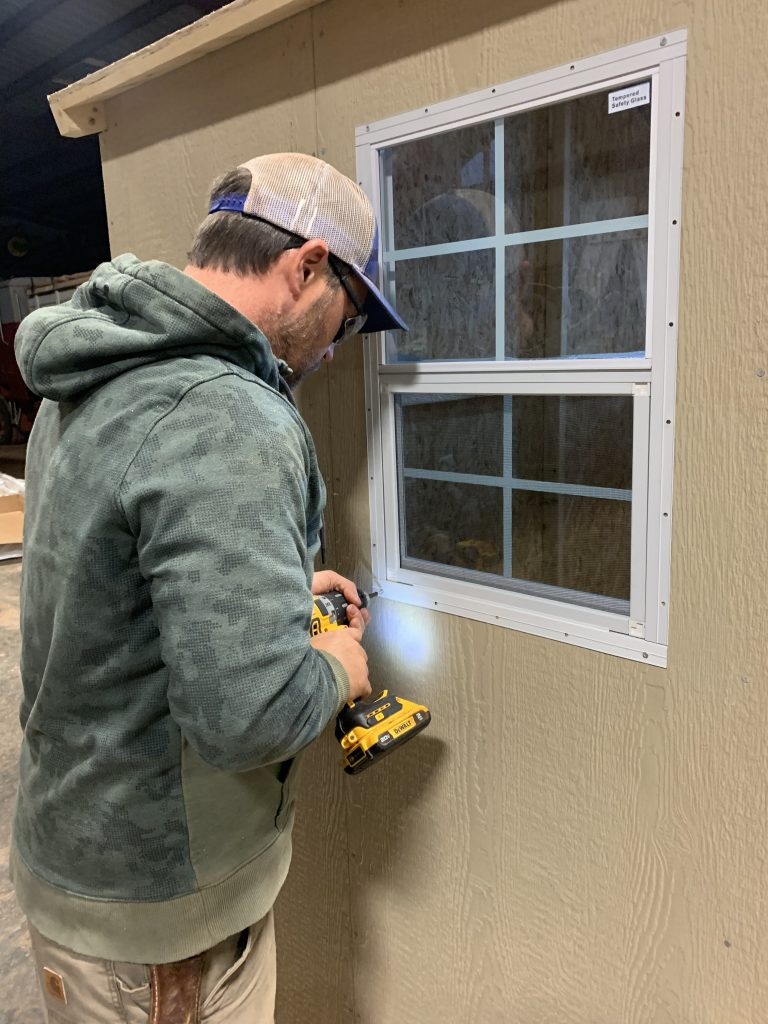
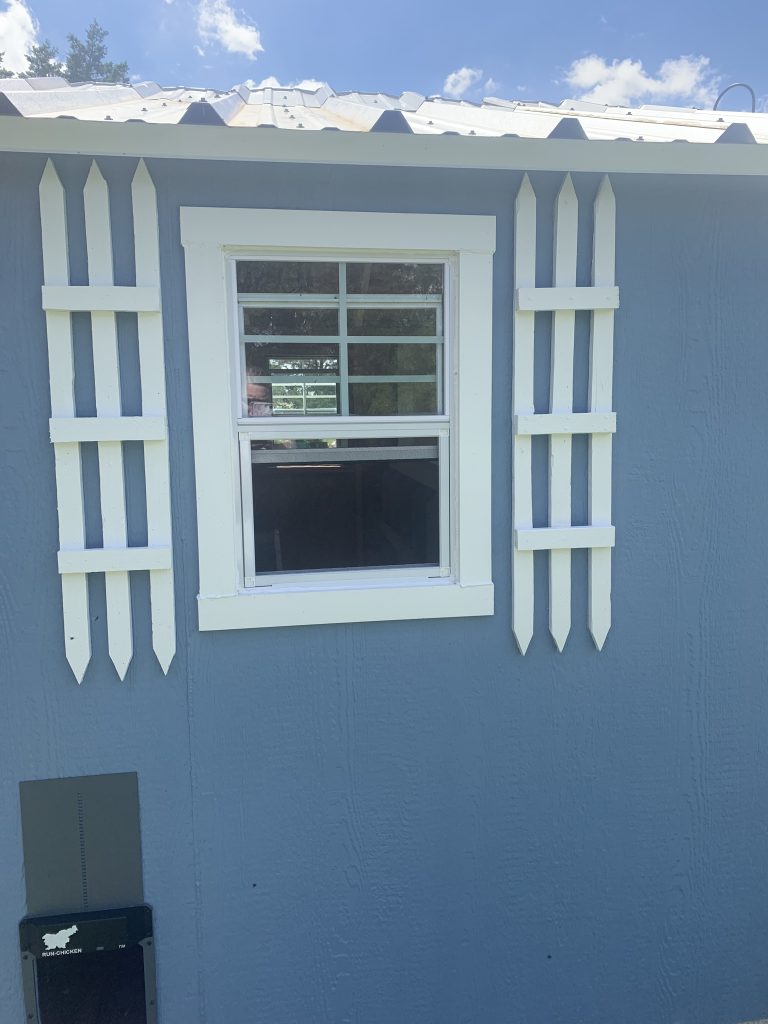
I knew from the start I wanted windows with screens so I could ventilate the coop on hot days. We ordered specialty windows that were suited for the building we purchased. Once they were installed, we moved to flooring.
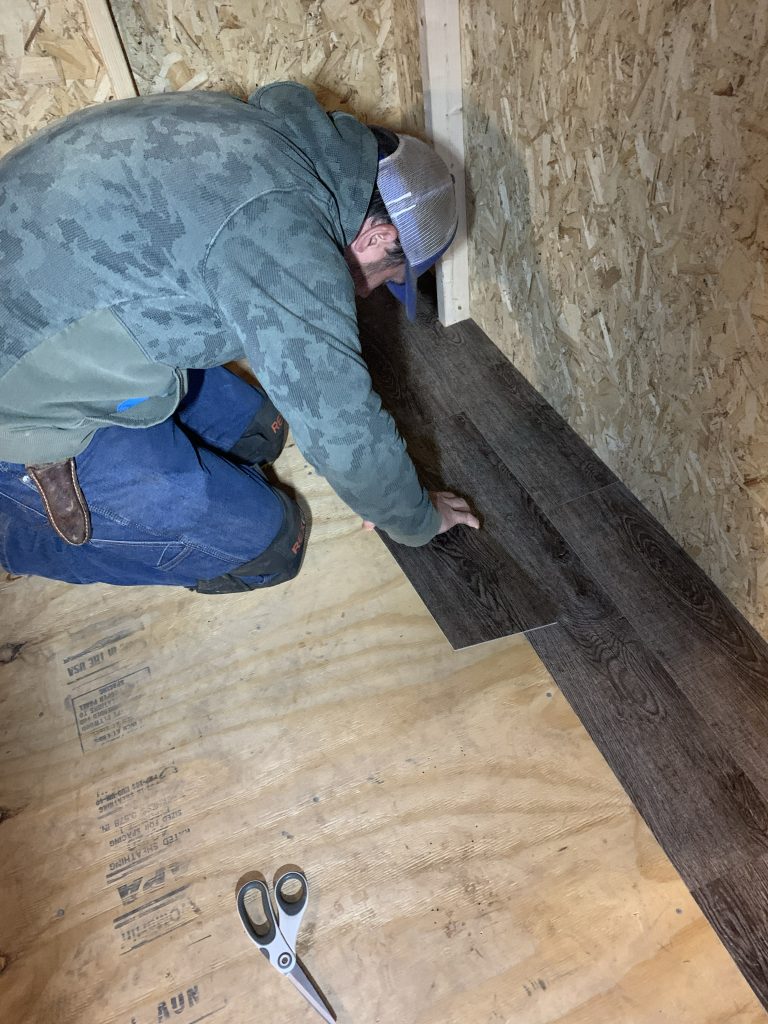


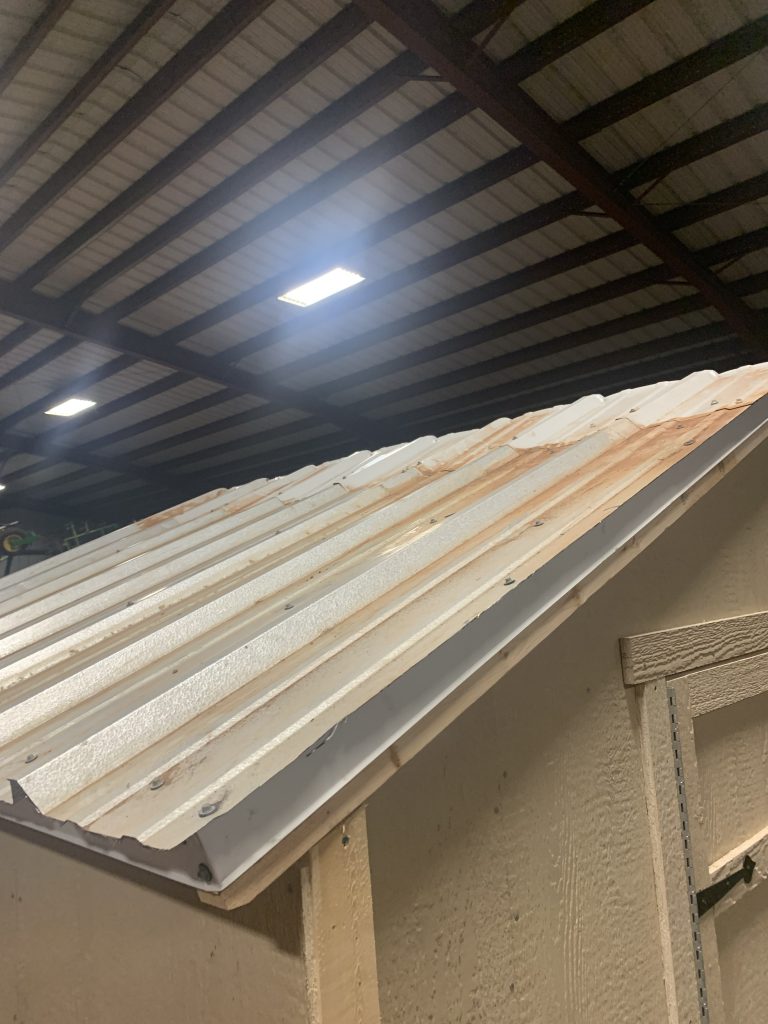
Any chicken owner knows those birds make huge messes. Between dropping and water spills, we had to cover the plywood floor with something to protect it. After some shopping at the hardware store, we settling on a water-proof vinyl flooring that had an adhesive backing. Landon and I worked together to install the planks one by one over two days. Next, he began working on the roof. To save money on materials and to avoid using shingles—which degrade over time—he salvaged some tin and installed it for the roof. One thing about tin, it will hold up to water and weather. To protect the interior from moisture, he applied a paintable, waterproof silicone caulk to any nails, screws or seams on the exterior of the building.
Turning a storage shed into a coop
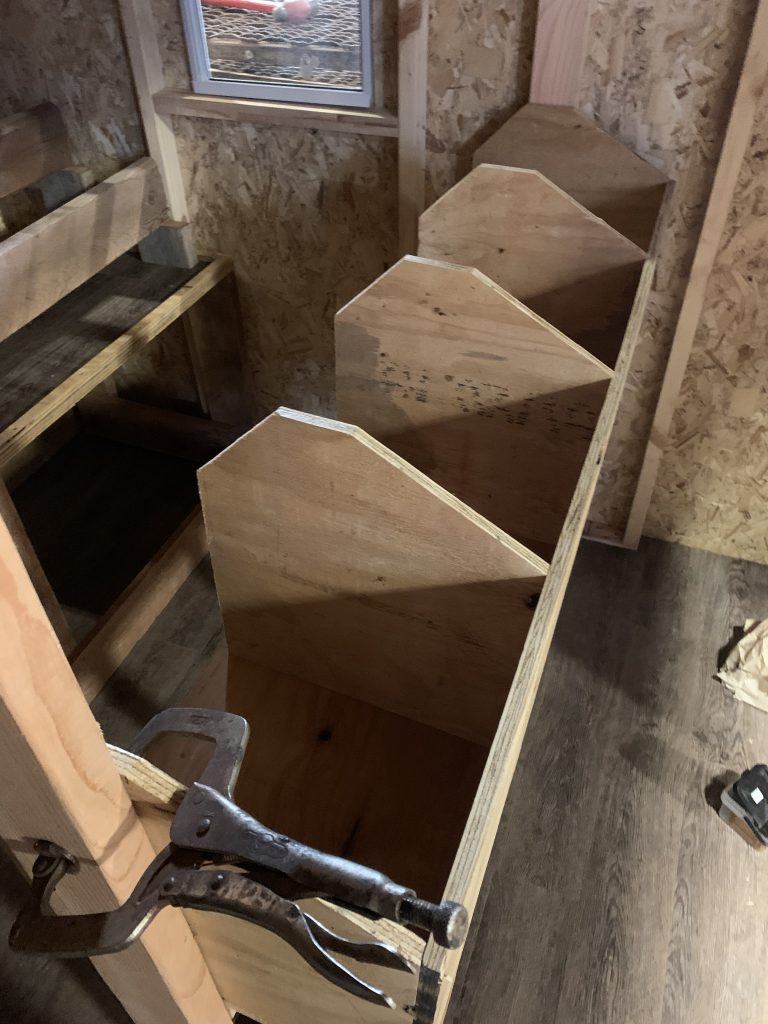
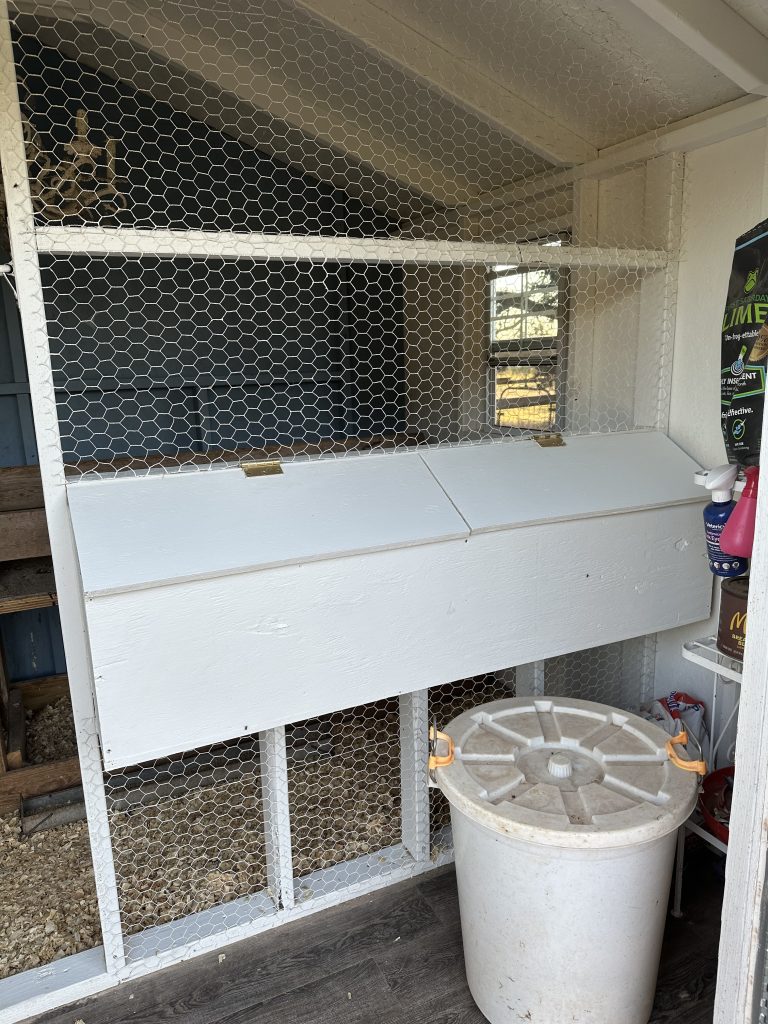
At this point Landon was probably regretting this project, especially when he realized he would have to create a poop board, a chicken roost and laying boxes. The poop board might be a foreign concept for non-chicken owners, but the purpose is to catch droppings while the birds are sleeping at night on the roost. The boards are often covered in sand or wood chips, which makes it easier to clean the coop and keep it sanitary. I found pictures of the poop boards I liked the most, and using plywood, we came up with a roost and poop board design.
We had a few pieces of the adhesive flooring left over, so we covered the plywood with the vinyl planks to protect it from moisture before attaching the roosting bars. Finally, we cut pieces of plywood to make a small border around the edges to keep the sand on the board. It was while I was using the cordless drill to attach the plywood border that the screw turned one way and drill went the other—right into my fingernail. I can officially say I bled for that coop!


The next task was to install the automatic chicken door. Ever since I started making plans for this coop, I knew it would have this feature. Never again will I race home to the beat fading sun, just hoping to get there before a predator meanders into my coop and ambushes my vulnerable fowl. Furthermore, this door frees up neighbors and family members from driving over to my house just to shut the gate if I am out of town. The door we installed is called a Run-Chicken door. It operates off of batteries and the open and shut times can be customized using a mobile app. I have to say, it is 100% worth the money and the hype. I can never go back!


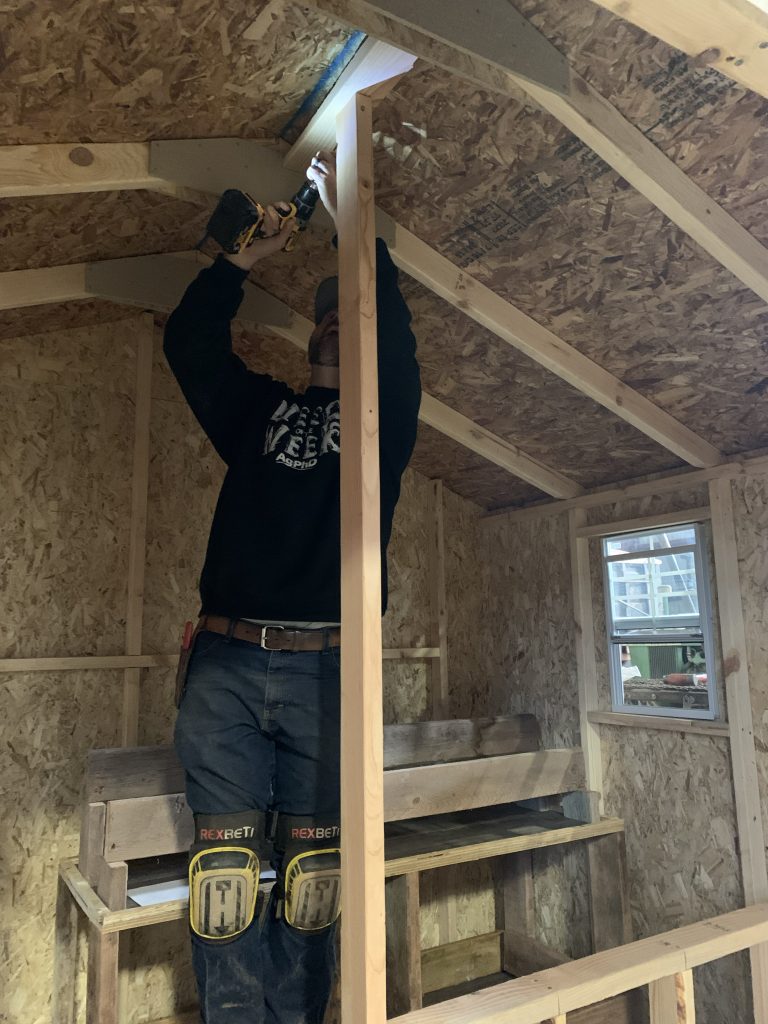
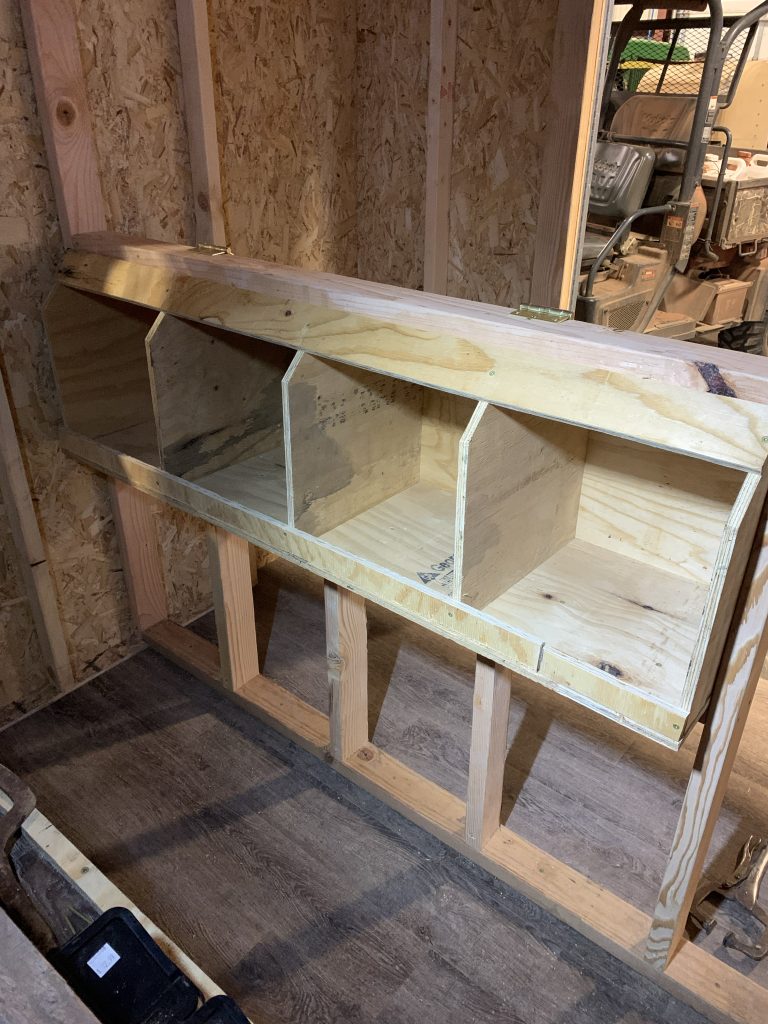
At this point we started building a divider wall to separate the front storage section of the coop from the area where the chickens sleep, eat and lay eggs. This was another feature I had planned on incorporating from the start. I knew it would be convenient to have a storage area for feed and supplies and to be able to access the laying boxes from the walk-in side of the coop.
I know from experience that being forced to walk through the coop to reach the laying box and collect the eggs is not ideal. No one enjoys chicken poop embedded in their shoes! We then planned out how many 2 x 4s we would need and where they should be placed to make it stable and functional. Getting a straight wall was a labor of love for Landon and he’s still so proud of it every time he walks into the chicken house.


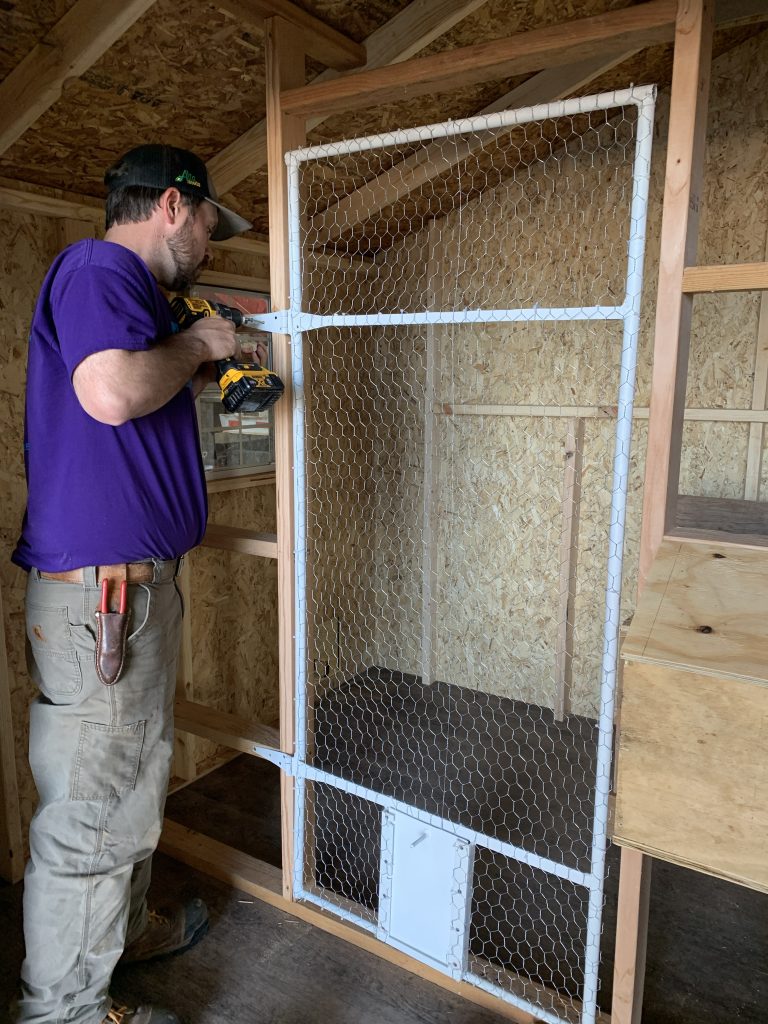
For a while, I had been thinking about what to use for a door to connect the storage area and the chicken side of the coop. The farmhouse we live in was built in 1956; Ed, the man who built it and lived there for many years was quite a craftsman. There is an old falling down chicken house several yards behind our home and the first time I saw the old metal door handing on the exterior, it caught my eye. Ed obviously built this door for a coop because it was covered with chicken wire and has a small chicken door at the bottom. I was convinced that this gate should be part of the new coop and it would be a sweet way to honor Ed and the homestead he developed and we now enjoy.
We removed the door, Landon cleaned up some rusty pieces with the grinder and we removed the old rusty chicken wire. I then spray painted the door white.


The next item on our checklist was to create a wooden laying box out of some leftover plywood. After watching some YouTube videos, we had a good plan to build a laying box that would be integrated into the divider wall, so chickens could access it from their side of the coop, and I could collect the eggs by opening a door from my side. We built four compartments, which is plenty for a coop that could house 12-14 birds.


Once the divider wall and laying box were constructed, we turned our attention back to the metal door and covered it with new chicken wire. We even used the original hinges to hang it in the coop. That Ed made quality items, that’s for sure. We were nearing completion of the wall, but there was still a lot of chicken wire work to be done. Landon and I worked as a team, using a staple gun to attached the chicken wire to the divider wall. The final step was a latch for the gate. My father-in-law stepped up to the plate in a big way for this element and fabricated a perfect latch.


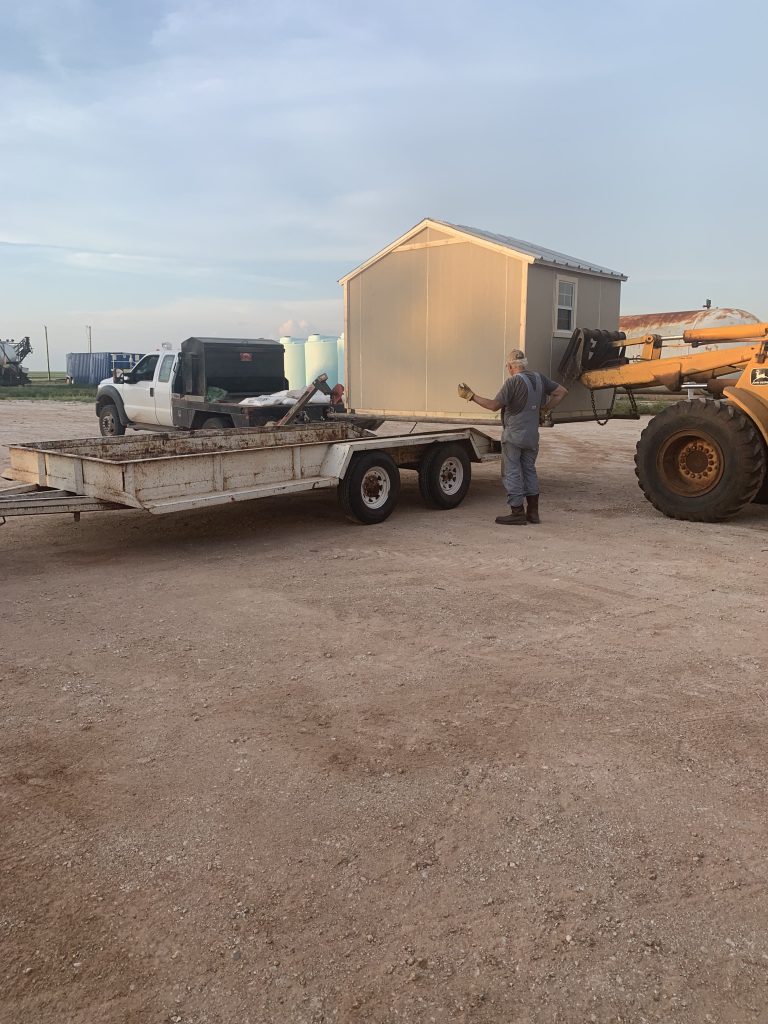
Time to move the coop
By this point we were finished with construction, and it was time to transport the building, which was extremely nerve-wracking. We were hopeful that the frame would be strong enough, but there were no guarantees. It would have been heartbreaking if the whole building had crumbled right before our eyes. To get the building out of the shed where it could be moved onto a trailer, Landon hooked chains through the eyelet holes on the sides of the building and attached the chains to the bale arms of his pickup. This allowed him to pull the building out in the open.
Next, my father-in-law got in his front-end loader and hooked chains though the eyelets to his loader arms. Between the pickup’s bale arms and the front-end loader, they were able to lift the coop several feet off the ground and onto a flat bumper trailer that was backed under the building. After placing the coop on the trailer bed, we all headed to the final destination with the magnificent coop. I was praying for the chicken house as I followed the trailer down the road to our backyard and apparently God heard me because it made the trip safe and sound. It was then unloaded in the same fashion and we could all breath a sign of relief.


Once the old coop and the new chicken house were sitting next to each other all I think about was The Beverly Hillbillies. My original coop looked like the Clampett’s old cabin in the hills and the new building was comparable in my eyes to the mansion they moved to in Beverly Hills after they struck it rich with black gold. It took a few weeks for the chickens to get comfortable in the mansion that suddenly showed up next to their dilapidated shack, but once they spent a night in the new chicken house, which I call the “Cackling Cottage,” they never wanted to sleep in the old coop again.
The next few months of summer I worked tiredly to paint the exterior and trim, then I moved indoors to put on a few coats of paint on the interior walls, divider wall and laying box. The summer heat made this a brutal undertaking and it might have taken me all summer, but I finally put the last coats on the ceiling in September.
To give a cottage feel, I wanted to attach white shutters next to each of the windows. Instead of purchasing expensive shutters, I chose to make my own using cement framing stakes that I found in an old building. I’m crafty like that! I used heavy duty glue and nails to make my version of a board and batten shutter. I then painted them white. Although my husband did not see the practical value in these accents, he nonetheless helped me glue them to the sides of the coop.


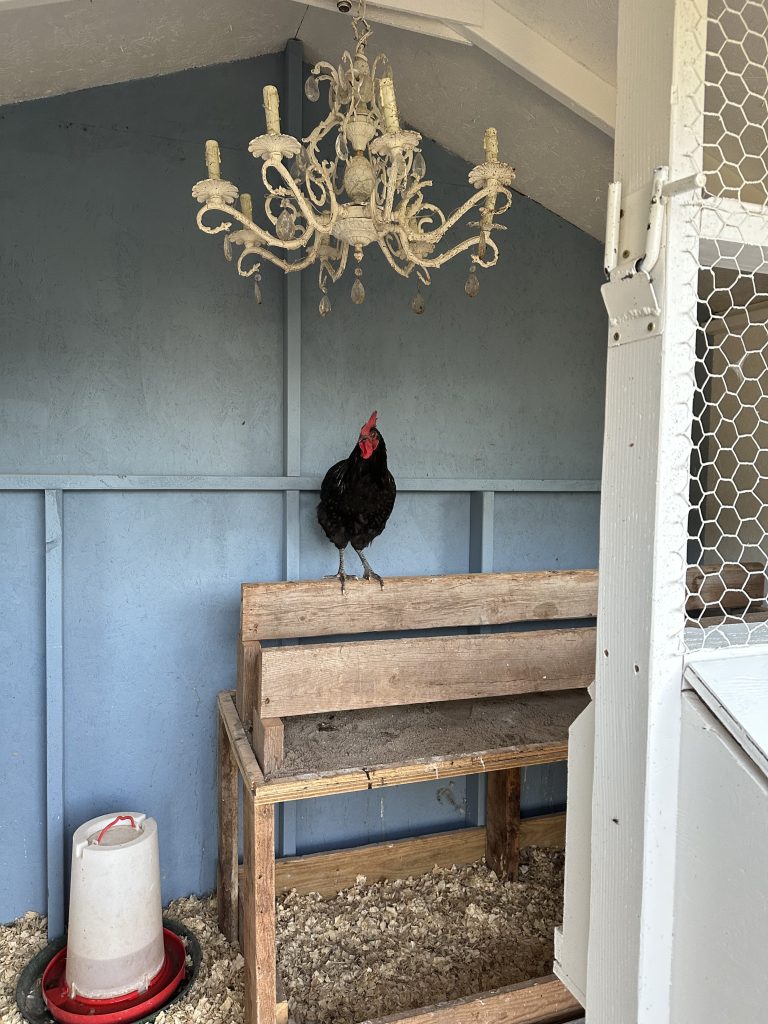
I had always pictured this dream coop with a dramatic chandelier in it and fortunately I had one laying around from our wedding. It took a little convincing, but Landon hung it in the center of the coop. It is not wired for power, but does have battery operated lights. Really, it’s more for ambiance than function and I think it adds the perfect touch to this chicken chateau. Finally, I purchased a solar lamp for above the double doors, a sign for the front of the coop and two planters to prevent anyone (namely me) from tripping over the eyelets on the frame. Our project is now complete and every time I look out the kitchen window I get to see our beautiful coop, and I know it wouldn’t have been possible without my dear husband.


When we started this venture, I thought it might be test for our marriage. It was sure to be a long, drawn-out and expensive project with little payoff apart from my happiness and of course, fresh eggs. One thing I knew by the end of this endeavor is that my guy loves me irrevocably. No one would spend days building a poop board if love wasn’t involved. If you’re looking for the right mate, my life advice is to find a man who will build you a chicken coop with minimal complaining. Those are the real gems and I’m so fortunate to have snagged one. And before anyone asks, my husband has stressed that this is the only coop that he will ever build and he is definitely not taking orders! He’s a one-hit wonder!
Lacey Vilhauer can be reached at 620-227-1871 or [email protected].
Related Articles